30-40
Fresh Clams (The More, The Better)
30-40
Fresh Clams (The More, The Better)
2-3
Cups Reserved Clam Juice
3
Slices Bacon, Diced (Uncooked)
½
Onion (Red and/or Yellow)
3-4
Tbsp Flour
2
Potatoes
1½
Cups Milk
2
Tbsp Butter
1
Tsp Oregano
1
Tsp Dill (Finely Chopped, More For Garnish)
1
Tsp Parsley
3
Bay Leaves
Salt
& Pepper to Taste (~½ - 1 Tsp Each)
This
menu idea started in San Francisco (far from New England, of course) where
Anastasia tried her first American clam chowder in 2008. More recently, she and I had some San
Francisco-style chowder on Pier 39. It
was served in sourdough bread bowls and tasted amazing. And now, during our current trip to Block
Island, I finally had the chance to show Ana the “art” of digging for clams.
 We
went to the one of the two best places I know to find clams…near Cormorant Cove
on the road that runs to the Coast Guard Station. It was Ana’s first attempt at clamming, and
because she didn’t yet have a license…I did most of the digging. She did try her hand at digging for a few
moments, but luckily got tired of the physical labor just minutes before the
shellfish warden paid us a visit and asked to see my license. What lucky timing.
We
went to the one of the two best places I know to find clams…near Cormorant Cove
on the road that runs to the Coast Guard Station. It was Ana’s first attempt at clamming, and
because she didn’t yet have a license…I did most of the digging. She did try her hand at digging for a few
moments, but luckily got tired of the physical labor just minutes before the
shellfish warden paid us a visit and asked to see my license. What lucky timing.
Ana
spent most of the rest of the time splashing around in the sandy-muck,
outlining areas that she insisted would be good for finding clams. She said she “felt” them…and I imagined she
was using her feet much in the way that robins and other birds use their fee to
“feel” the worms in the ground.
Strangely, she was often right.
Of course, the entire flat was a clamming bed, and she could have told
me to dig anywhere, and we would have found at least a few clams.
A
storm was coming…and we fully intended to only find about 20 clams. Besides, Ana gets cold easily and I knew we
wouldn’t be out for long. We got our
small number of clams and left just in time…a heavy downpour started about ten
minutes after we left.
 The Clams
 Of
course, the best way to make clam chowder is to find (or buy) fresh clams still
in their shells. If you can do
this…steam them in a pot with a little water to provide the initial steam. Once they’ve all opened (5-10 minutes), save the clam juice, remove the clam
meat from their shells, and set aside for later. Also throw away any clams that don’t
naturally open on their own after they’ve been cooked. They could be unhealthy to eat…and is one
clam really worth the risk?
Of
course, the best way to make clam chowder is to find (or buy) fresh clams still
in their shells. If you can do
this…steam them in a pot with a little water to provide the initial steam. Once they’ve all opened (5-10 minutes), save the clam juice, remove the clam
meat from their shells, and set aside for later. Also throw away any clams that don’t
naturally open on their own after they’ve been cooked. They could be unhealthy to eat…and is one
clam really worth the risk?
If
you can’t get fresh clams, a 16oz can should be enough…but feel free to
indulge.
 The Potatoes
For
our small batch of chowder, we used two potatoes, which had been cut into cubes
about ½” on a side. In a small pot, boil
the diced potatoes with the bay leaves in the clam juice you’ve just
saved. Depending on how many clams you
used and how much water you initially added, you may need to use water to
adjust the total volume of clam juice.
We boiled the potatoes in about 1 cup clam juice and 1 cup water (2 cups
of “clam juice” total).
 Cook
the potatoes about halfway. You don’t
want them to be completely cooked, because you run the risk of them turning to
mush later.
Cook
the potatoes about halfway. You don’t
want them to be completely cooked, because you run the risk of them turning to
mush later.
 The Bacon, Spices, Onion, and Roux
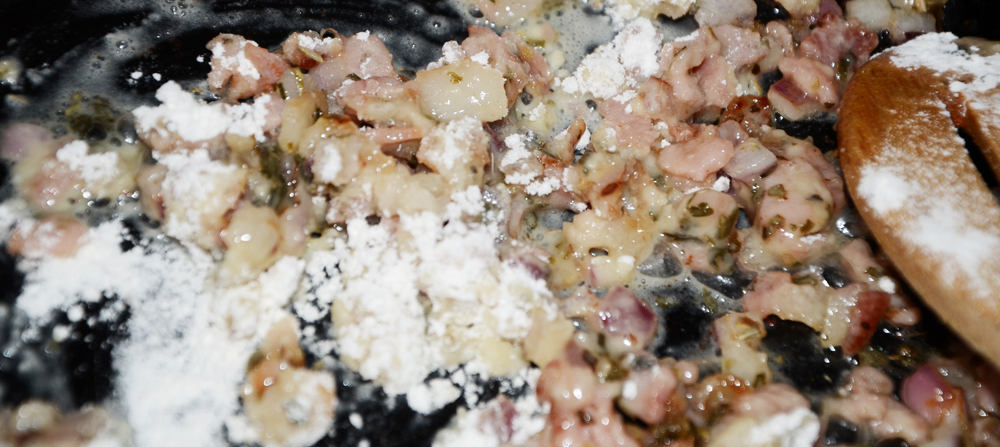
While
the potatoes are-a-cookin’, add the butter, bacon, onion, oregano, and parsley
in a frying pan. Your goal here is
similarly to not fully cook the
onions, and so, you should aim for a soft, but not browned, onion.
 When
you’ve deemed your onions cooked, add the flower – slowly – while stirring the
fry mixture. The 3-4 Tbsp estimate is
just that…a guess. When I cook, my goal
is to add enough flour to soak up the oils/fats that are in the pan. In this case, you need enough to make a roux
from the butter and bacon fat you have in the frying pan.
When
you’ve deemed your onions cooked, add the flower – slowly – while stirring the
fry mixture. The 3-4 Tbsp estimate is
just that…a guess. When I cook, my goal
is to add enough flour to soak up the oils/fats that are in the pan. In this case, you need enough to make a roux
from the butter and bacon fat you have in the frying pan.
 And
I don’t know what my sister, the CIA (Culinary Institute of America) graduate
would say, but if you’ve never made a roux, I’ve found it best when the final
mixture is still oily, but thick enough that as the flour fries, the bubbles
are firm enough to pop and then remain for a few seconds afterwards. Another indicator to me is that I’ve added
enough flour so as to eliminate all standing oils, which have been entirely
incorporated into the roux.
And
I don’t know what my sister, the CIA (Culinary Institute of America) graduate
would say, but if you’ve never made a roux, I’ve found it best when the final
mixture is still oily, but thick enough that as the flour fries, the bubbles
are firm enough to pop and then remain for a few seconds afterwards. Another indicator to me is that I’ve added
enough flour so as to eliminate all standing oils, which have been entirely
incorporated into the roux.
By
the way…I should have mentioned earlier…if you’ve never made a roux, it’s a
toasted flour mixture with oil/fat that adds flavor (toasted flour flavor) and
thickens your cooking. The darker you
toast the flour, the more flavorful the roux.
 Putting-it-Together
Decant
the clam juice from the potatoes…
OK…sorry…that’s
a term I use frequently in lab and I figured I’d use it here…basically…pour off the clam juice
leaving the bay leaves and potatoes behind.
 …and
add the juice to the roux-onion mixture.
Mix well and then add the mixture to a pot. This could be the same pot as the one you
cooked the potatoes, but again…you’re trying to control how much you cook the
potatoes…so set them aside for a few more minutes.
…and
add the juice to the roux-onion mixture.
Mix well and then add the mixture to a pot. This could be the same pot as the one you
cooked the potatoes, but again…you’re trying to control how much you cook the
potatoes…so set them aside for a few more minutes.
 Add
to your chowder the milk, salt/pepper, and dill. Heat to a low simmer and then add your
potatoes back in. Cook for a little
while…then add your clams (chopped) in.
The chowder is ready when the potatoes are cooked to taste.
Add
to your chowder the milk, salt/pepper, and dill. Heat to a low simmer and then add your
potatoes back in. Cook for a little
while…then add your clams (chopped) in.
The chowder is ready when the potatoes are cooked to taste.
 If
we experiment with other types of bread bowls in the future, a link will appear right below this sentence.
If
we experiment with other types of bread bowls in the future, a link will appear right below this sentence.
 For
now, I needed to make a quick bread bowl and so bought frozen white bread dough
from the store, thawed one, split it in half, formed each piece into a ball, added some oregano, salt, and parsley as seasoning, and let the dough rise for an hour before baking at 350 degrees until fully baked. Nothing special. When done, the top crust was cut out and the
fluffy bread inside was pushed down to make the bowl more waterproof.
For
now, I needed to make a quick bread bowl and so bought frozen white bread dough
from the store, thawed one, split it in half, formed each piece into a ball, added some oregano, salt, and parsley as seasoning, and let the dough rise for an hour before baking at 350 degrees until fully baked. Nothing special. When done, the top crust was cut out and the
fluffy bread inside was pushed down to make the bowl more waterproof.
 Separately,
I tried the following recipe, though didn’t get the chance to use it as a bread
bowl. Anastasia and I did, however, get
the chance to try this bread the next night with pulled pork barbecue, which
incidentally will be a future blog post...so stay tuned.
Separately,
I tried the following recipe, though didn’t get the chance to use it as a bread
bowl. Anastasia and I did, however, get
the chance to try this bread the next night with pulled pork barbecue, which
incidentally will be a future blog post...so stay tuned.
1 Loaf White
Bread Dough, Thawed
¼ Red Onion,
Finely Diced
2 Tbsp Chopped,
Fresh Dill
1 Tsp Garlic
Powder
3 Tbsp Grated
Parmesan Cheese
1 Tbsp Olive Oil
Mix
all these ingredients, knead the dough a bit, and then form into balls. Let rise for about two hours (or as desired)
and then bake until fully cooked.
Other Ideas
Use
more bacon!
Add
red pepper flakes to the clam chowder for a little extra kick. But don’t add too much because you don’t want
the heat of the pepper to overcome all the other flavors…especially the bacon.
 Enjoy!
JK
 My family has enjoyed linguini with clam sauce for many years. We prepare it for special occasions, though those evenings usually tend to be Sundays (because…well…if you know my family, Sunday is “pasta night”).
 Heat the butter in a frying pan (I prefer cast iron) and once all the butter has melted, add the flour. On medium heat, fry the flour until it has been cooked to a light brown (as compared to the near-white of all-purpose flour). Stir the roux frequently to prevent burning and evenly toast the flour. Set aside to cool for later. Making a full cup of roux leaves you with a good deal excess, which can be saved for some future soup or stew.

 Add the bottled clam juice and the canned juice as well. Save the clams for a bit…they were cooked enough when they were canned. Add about a half cup of the roux and heat until the sauce is an even consistency, using a wire whisk to mix-in the roux. Cook the sauce for at least five minutes before deciding whether to add additional roux to thicken the sauce. And as I mentioned at the start of this post, don’t add too much.